Home > Administrator User Manual > 2 Managing Your AEPSi Account > 2.4 Custom Fields
2.4 Custom Fields
As an administrator you have the ability to create custom fields that will be displayed on the child profile page. If there is any information that you would like AEPsi to track (i.e. program entry date, race/ethnicity), you can use the custom field feature. There are five types of custom fields that can be created: a text field, a number field, a date field, a yes/no field, or a dropdown menu. You also have the ability to specify whether or not a custom field is required and can select pre-formatted options for the custom fields.
2.4.1 Create Custom Fields
To create a custom field:
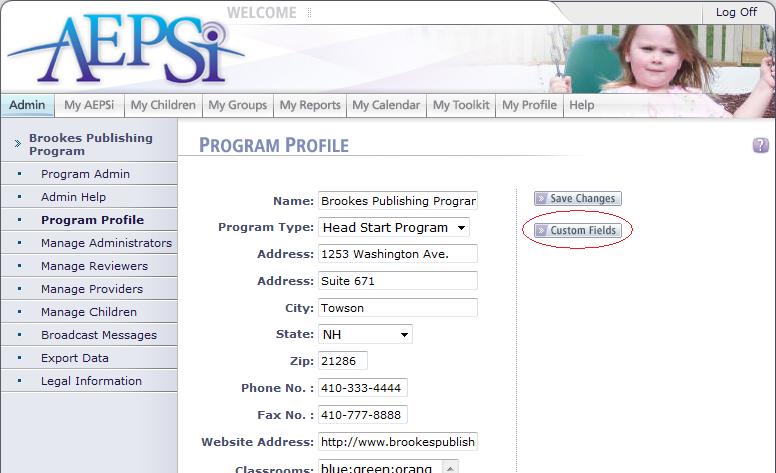
- Go to your Admin Program Profile on the left menu or select the "View Program Profile" button on the main Program Admin page.
- Select the "custom field" button.
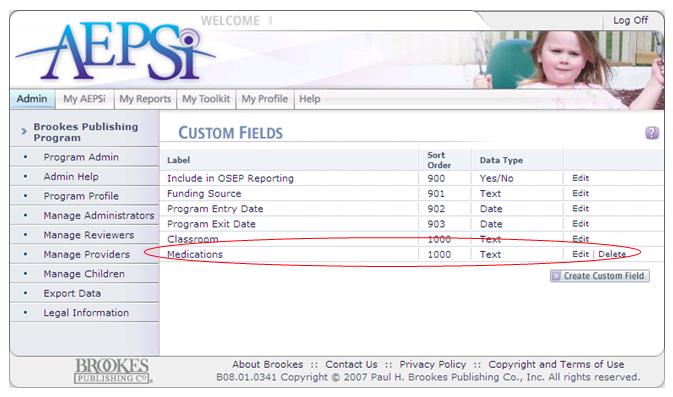
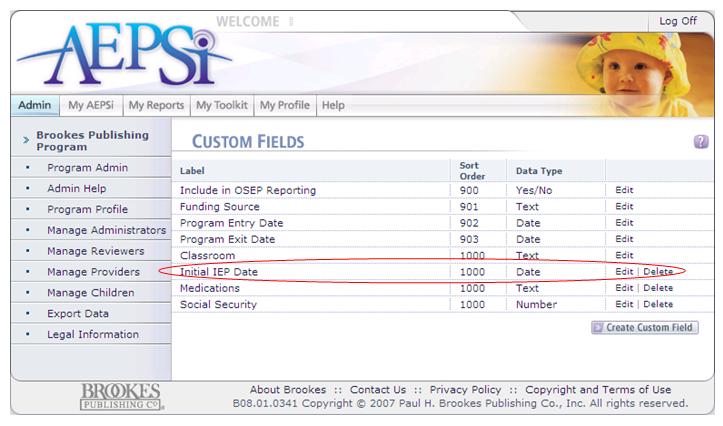
This will take you to the Custom Fields page, which will show a list of your current custom fields and allow you to create new custom fields.
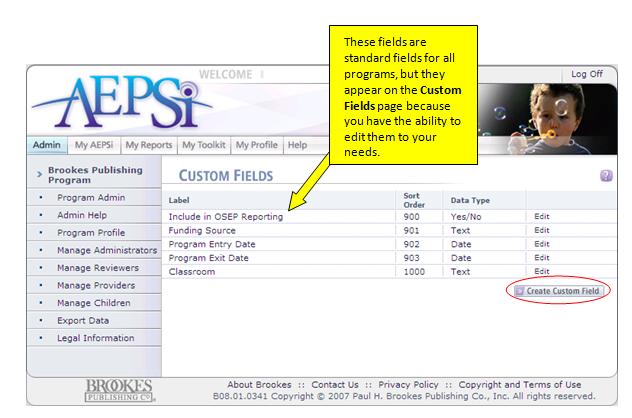
- Select the "create custom field" button.
This will take you to the Edit Custom Field page, where you can select the specifics for your custom field.
2.4.2 Custom Field Options
Below is a brief description of the custom field options that are available. Fields marked with a red arrow are required.
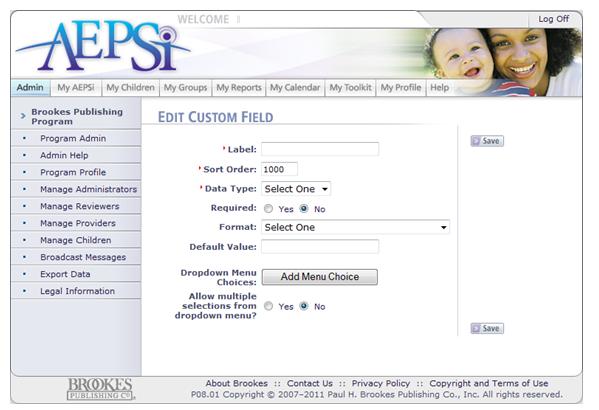
- Label: Create a label for the custom field. The label will appear on the Child Profile page.
- Sort Order: You can type in a number that will determine the order the custom fields will appear on the Child Profile page. The lower the number, the earlier in the order the field will appear. As a default, the number 1000 will appear when you create a new custom field. If all custom fields are left with this default value, the custom fields will appear in alphabetical order.
- Data Type: Select the type of custom field. The choices are text, number, date, yes/no. If you are creating a dropdown menu, you must select text as the data type.
Text: Field that holds any combinations of numbers, letters, characters
Number: Field that holds numbers only.
Date: Field that holds a date in the format mm/dd/yyyy or mm/dd/yy
Yes/No: Field where user has the option to select "yes" or "no".
- Format: You can optionally select a format for the custom field. Options include social security (999-99-9999), short date (mm/dd/yy), extended zip code (99999-9999), etc.
- Required: Here, you can specify whether you want the custom field to be required.
- Default Value: Enter a default value for your custom field. When a user adds a new child profile, the default values will appear automatically in the custom field.
- Dropdown Menu Choices: If you want to create a dropdown menu for a text field, you can enter in values to place in the dropdown menu.
- Allow multiple selections from dropdown menu: This option applies to the dropdown menu custom field. Selecting "yes" will allow users to select multiple choices from the dropdown menu.
Once you have made your selections, click the Save button. The custom field will now appear on the Child Profile page for all children in your account.
2.4.3 Examples of Custom Fields
To give you a better idea of how the custom fields work, we’ll demonstrate creating each of the five types of fields: text field, number field, date field, yes/no field, and dropdown menu field.
Creating a Text Custom Field
To demonstrate this type of field, let’s say that we would like to create a field on the child’s profile for a provider to record the medications a child is taking.
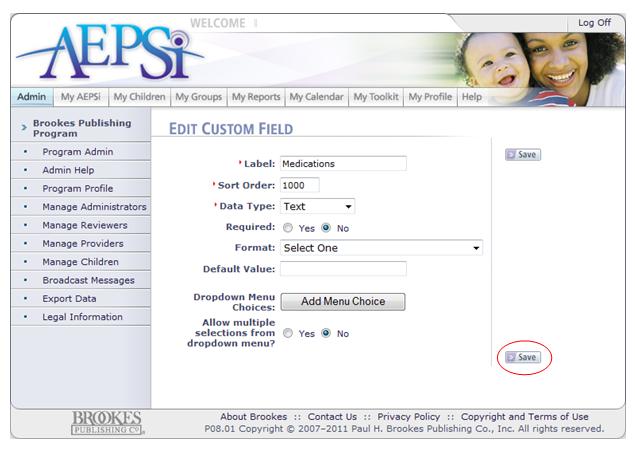
We will call this field “Medications,” so this is what we enter into the Label field.
Since we don’t have a particular order we want this field to appear in on the child’s profile page, we’ll leave the sort order at the default of 1000.
For Data Type we’ll select “Text” since this is a field that people will be able to write in.
We do not want to make this field a required field on the child's profile, so we will mark the Required field "No."
There is no particular format for this field, so we will leave that blank.
There is no default value and no dropdown menu choices since it's not a dropdown menu field, and the multiple selections is only pertinent to dropdown menu fields so we can skip that as well.
We can then hit the Save button.
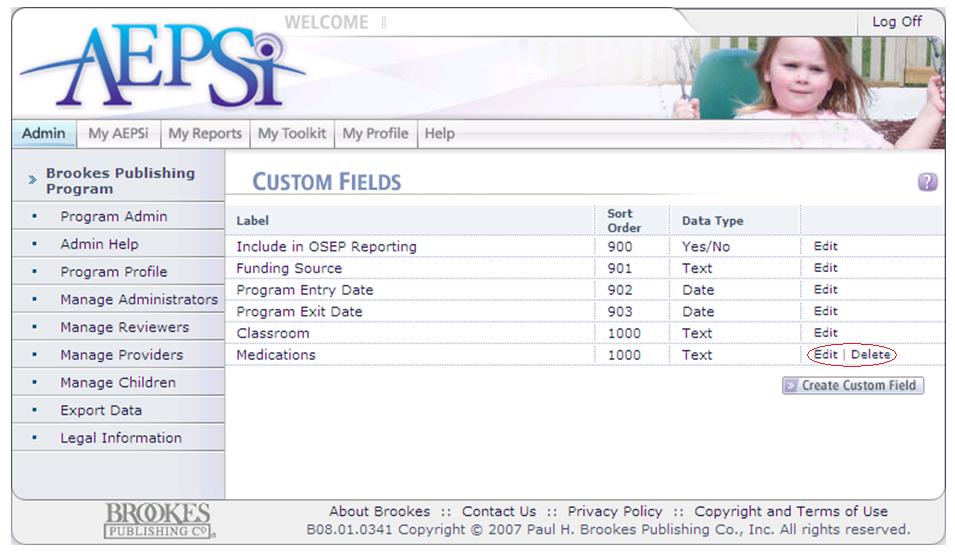
Our new custom field will now appear on the Custom Fields page.
Creating a Number Custom Field
To demonstrate this type of field, let’s say that we would like to create a field on the child’s profile in which to enter the child’s Social Security number.
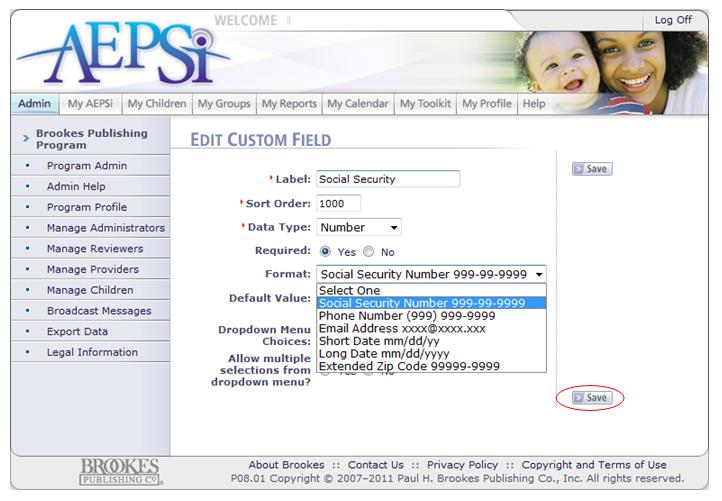
We will name this field “Social Security,”
Leave the sort order at 1000,
Select “Number” for the Data Type since this field is a number,
Make the field a required field on the child’s profile,
And select the “Social Security Number” format from the Format dropdown menu—this will ensure that users enter the Social Security number properly.
There is no default value for this field and we can skip the items dealing with dropdown menus since it is a number field.
We can then hit the Save button.
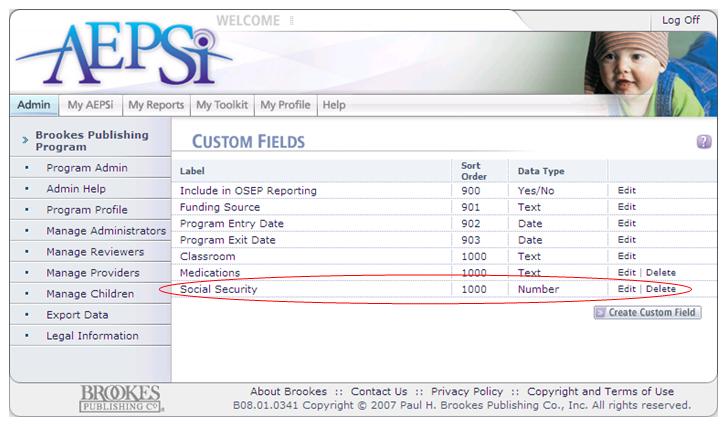
Our new custom field will now appear on the Custom Fields page.
Creating a Date Custom Field
To demonstrate this type of field, let’s say that we would like to create a field on the child’s profile in which to enter the date of the child’s first IEP.
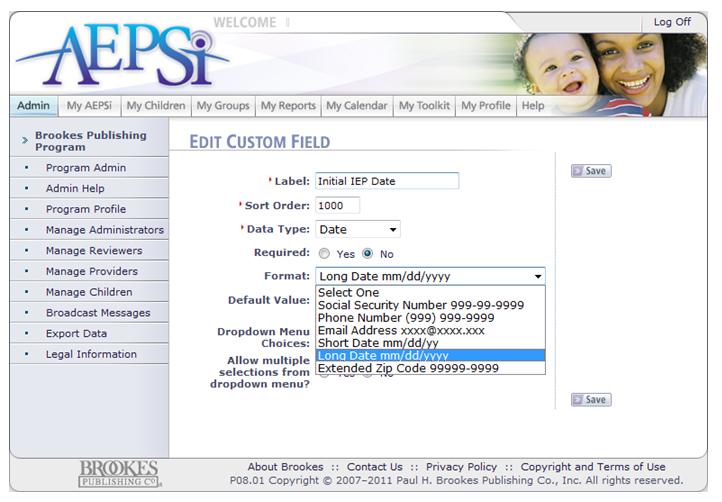
We will call this field “Initial IEP Date.”
We will leave the sort order at the default of 1000.
For Data Type, we will select "Date."
We will not make this field required.
And for Format we will select the "Long Date," meaning that users will need to enter all four digits of the year.
There is no default value for this field and we can skip the items dealing with dropdown menus since it is a date field.
We can then hit the Save button.
Our new custom field will now appear on the Custom Fields page.
Creating a Yes/No Field
To demonstrate this type of field, let's say that we would like to create a field on the child's profile in which to capture the child has an IEP.
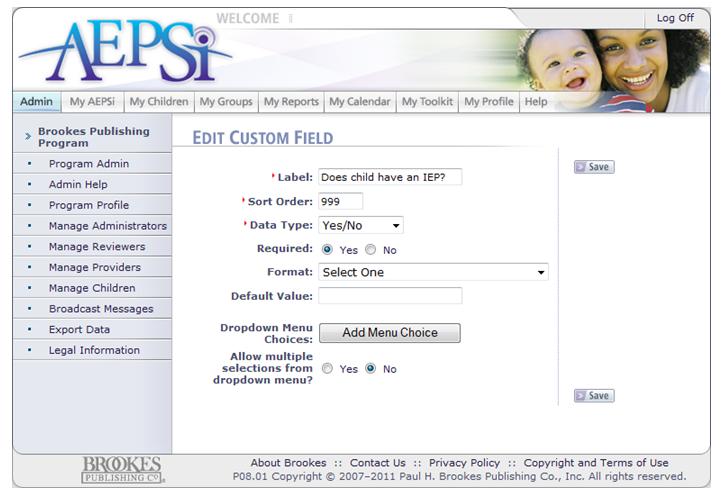
We will call this field "Does child have an IEP?"
Since we want this field to appear before our Initial IEP Date field, we will make the sort order 999.
The data type of this field is "Yes/No."
We will make this a required field.
It doesn't have a specific format, default value, or dropdown menu items.
We can now hit the Save button.
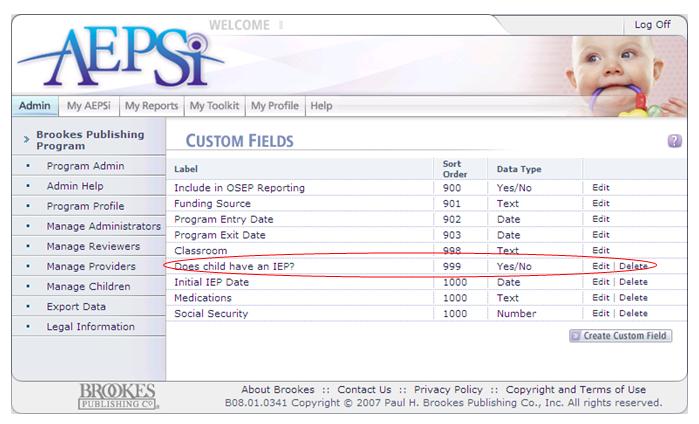
Our new custom field will now appear on the Custom Fields page.
Creating a Dropdown Menu Custom Field
To demonstrate this type of field, let's say that we would like to create a field on the child's profile in which to capture the child's race/ethnicity.
We will call this field "Race/Ethnicity."
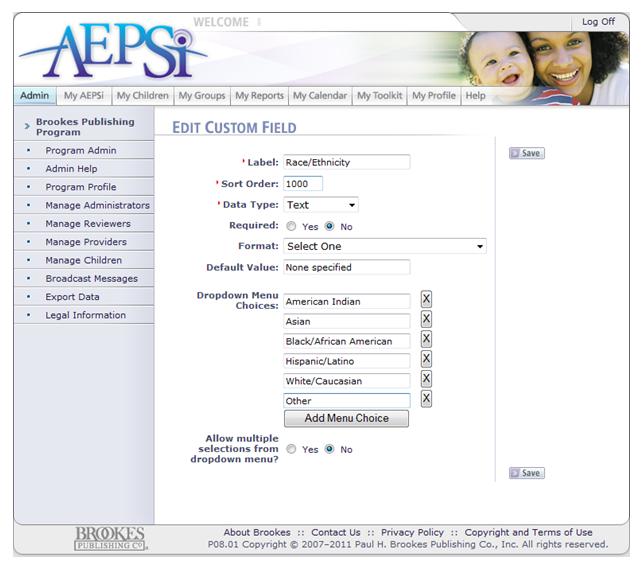
We will leave the sort order at the default of 1000.
The Data Type for this field is "Text."
We will not make this a required field.
There is no specific format.
We will make the default value "None specified" and then enter the choices we would like to appear in our dropdown menu in the Dropdown Menu Choices field.
We do not want users to select multiple options from the dropdown menu, so we will leave this at "No."
We can now hit the Save button.
Our new custom field will now appear on the Custom Fields page.
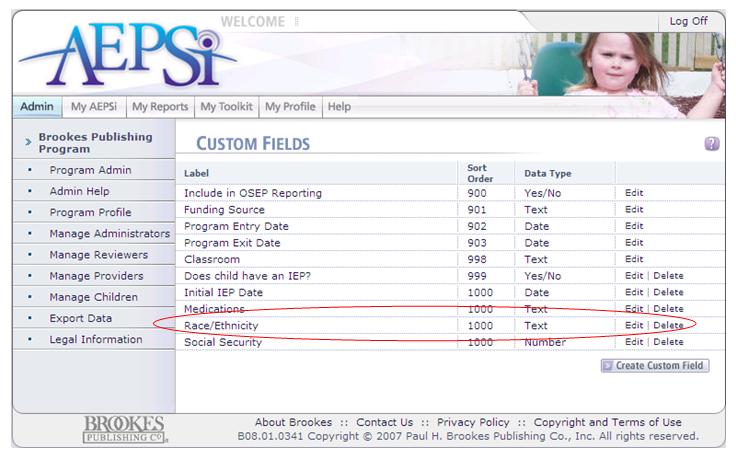
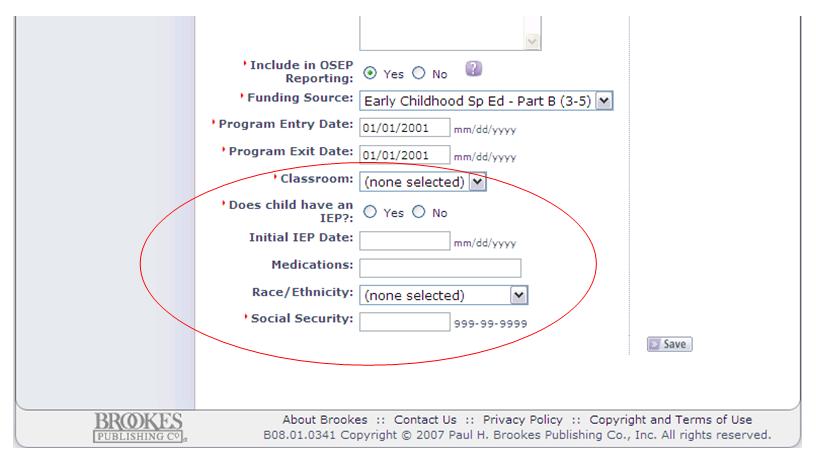
Now when you look at child's profile, you will see all of the custom fields we created at the bottom of the profile page.
2.4.4 Edit/Delete a Custom Field
To edit or delete a custom field, select Program Profile from the left menu and click the custom fields button. Select the edit link to edit the custom field. Select the delete link, to delete the custom field.

Previous | Next
See also

2.1 Navigating the Program Administration
2.2 Program Profile
2.3 Subscription Details
2.5 Broadcast Messages
|


 Page URL: